Practical uses for exported data from DeskTime
By consistently using DeskTime for automatic time tracking, you’re creating a vast database of accurate, insightful, and invaluable information. DeskTime offers many options to export this information, but plain numbers don’t mean anything until they’re put into context. Here we’ll go over some practical uses of exported DeskTime data, and how to analyze the exported data in your Excel spreadsheet.
Note: The images of this tutorial were taken from a Windows computer using Open Office, a free software. Other software that helps with reviewing the data may display the exported information a bit differently but should have the same functions available.
Want to get the most out of your time?
Try DeskTime for free!
Try free for 14 days · No credit card required.
By signing up, you agree to our terms and privacy policy.
1. Create a basic overview of all your employees
We’ll show you how to get a basic overview table of all of your employees, which you’ll be able to manipulate based on what information is important for you. This information is accessed by the Owner of the account (the owner has access to all of the employees), and an Administrator can do the same but only for the employees that the Admin has access to. In the end, you’ll see something like this:
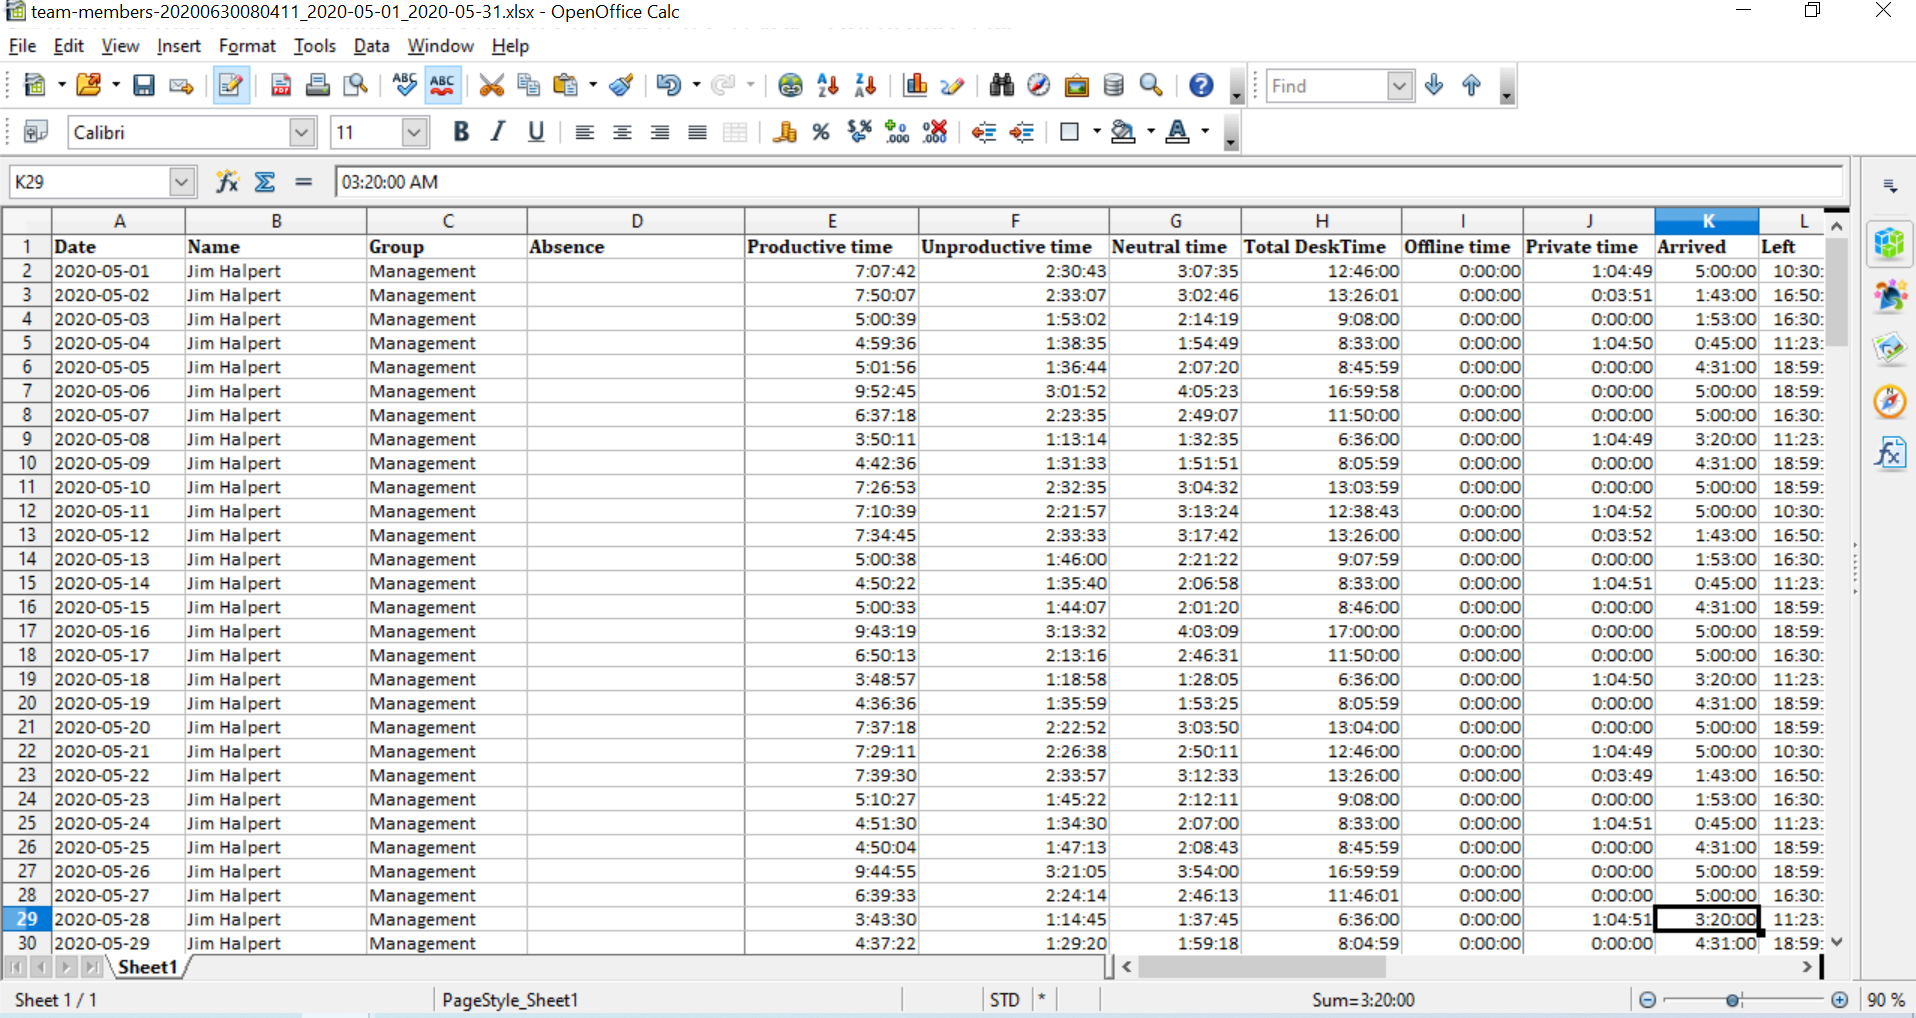
You’ll be able to manipulate and sort elements such as groups, employees’ productive/unproductive/neutral time, total time, offline time, arrival time and departure time. You’ll also have the ability to monitor employees’ working location and absence excuses.
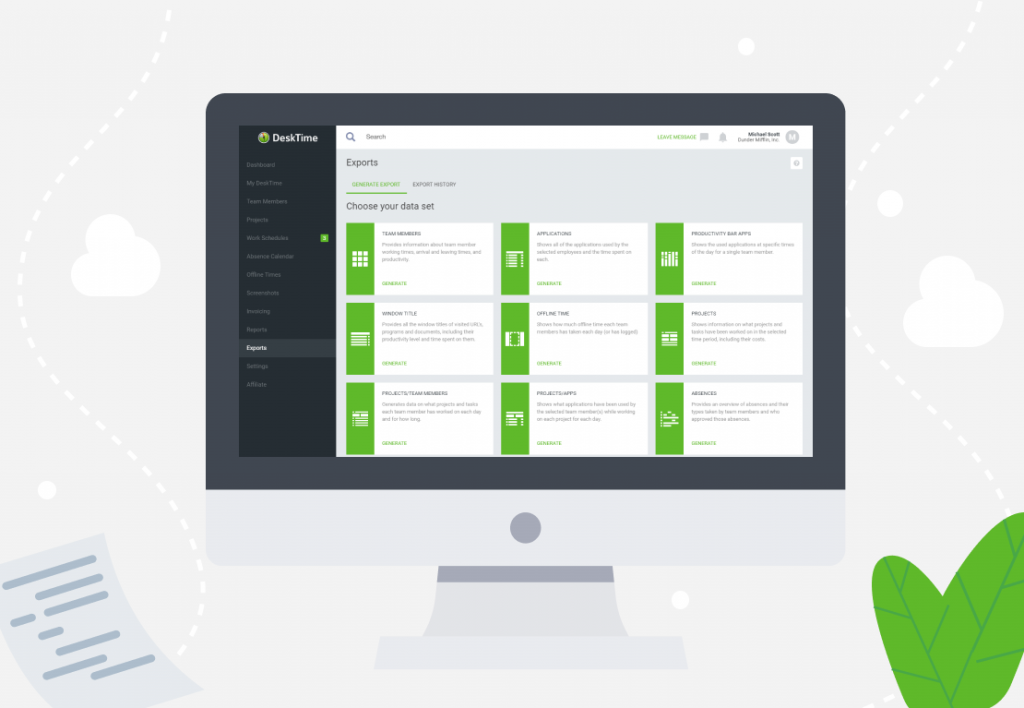
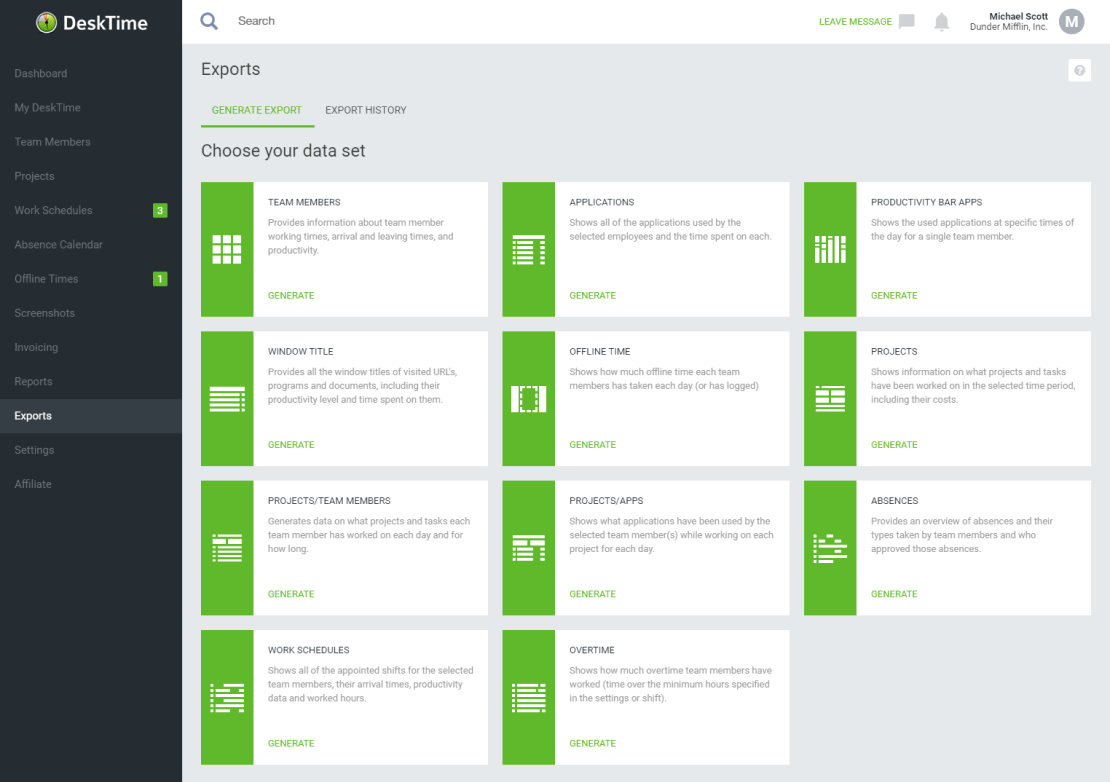
To create this table, go to your DeskTime exports section, where you can choose your preferred data set as the exports section offers different types of data summaries for your overview. In this particular case you should choose the “Team members” data set by clicking on the “generate” button.
Next you’ll be able to enter the export title and either choose the time frame you’d like to work within from the automated options or insert the period manually. We suggest at least a monthly view to get a good idea of average times. There’s also an option to select particular teams or all of them as well as select members of the teams whose DeskTime data you’d like to overview.
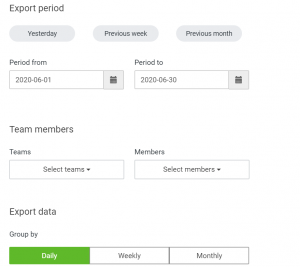
You can also choose to group the data by day, week or month. It’s useful if you want to overview, for example, the total number of hours spent working during the last month or to see which employee has the highest monthly productivity ratio (for more detailed description on this matter see the 2nd point on this brief tutorial).
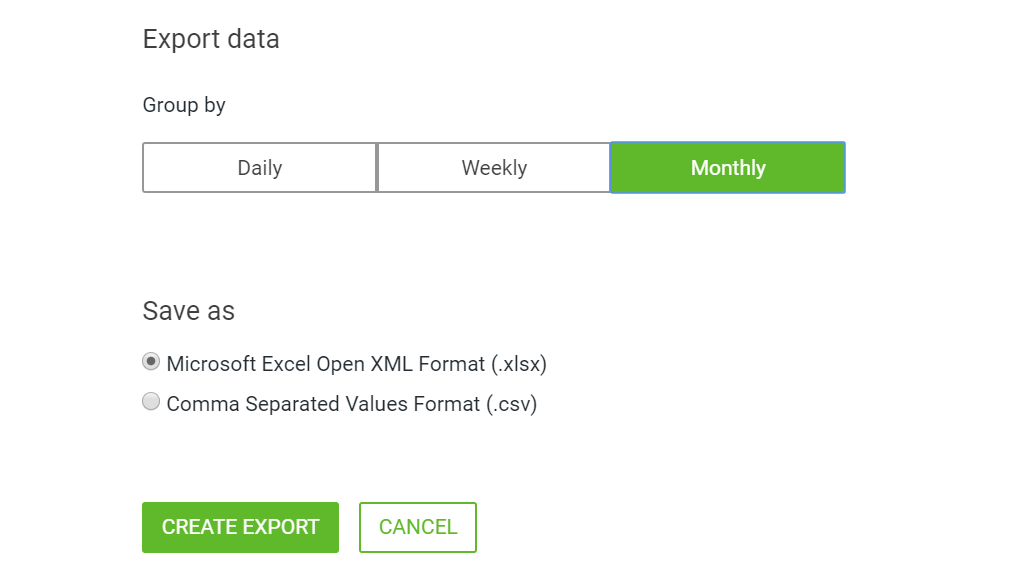
Then select the format in which you want the export file to be saved as (we suggest “.xlsx”). When done, click the “create export” button.
The page will redirect you to the “export history” section where it may take some time for the program to collect all the data (depending on its extent- may be up to 30 minutes for extra large companies). Once the collecting is done, you’ll be able to download the file by clicking the “Download” button in the “Progress” column.

After opening the downloaded file you’ll see that there’s a data sorting option in order to make data analysis easier. Select the entire page (by clicking the corner cell), go to the “Data” tab and then select the “Sort” option. You’ll be able to choose different sorting criteria (in our case we sorted data by “Productive time”). From here you can select an ascending or descending view. After confirming your choices by clicking the “Ok” button, you should see that the data is sorted according to your choices.

2. Gather employees’ monthly hours worked
One of the benefits of using DeskTime as a productivity tracking software is having an accurate account of how many hours are actually spent working. For employers paying hourly wages, this can be particularly useful to make sure that your company is paying for the correct amount of work done.
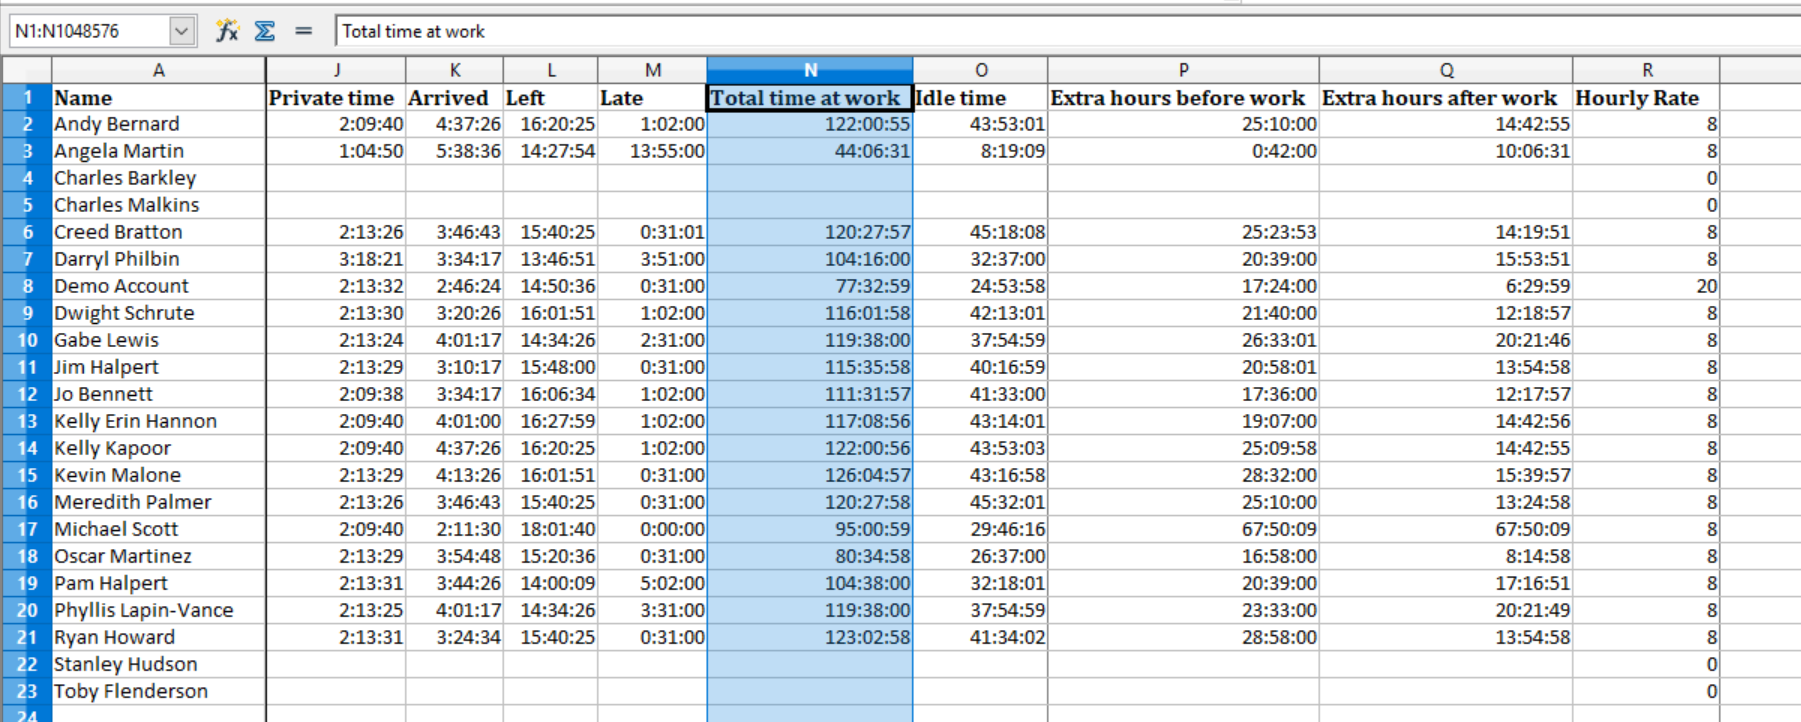
As mentioned earlier in the tutorial, DeskTime offers an option to export data grouped daily, weekly or monthly automatically. In this case the monthly data group makes employees’ monthly working hours count easier and faster. What you get after downloading the mentioned data group is a compact overview that includes, for example, the data section “Total time at work”, which can help you with the calculation of monthly wages.
3. Find other information that may interest you and review it
As mentioned above, the monthly report exported from DeskTime includes other useful information that may help in analyzing performance of your employees. It sums up the productive time, unproductive time, neutral time or timing that your employees have been late to work, and other information for your analysis.
The monthly data can also be sorted as mentioned in the 1st point of this tutorial, for example, by arranging it by productive time in a descending or ascending order to acknowledge the most effective employees of the past month. Monthly overview can also help noting workers that have a high ratio of unproductive working time in order to help them raise their capacity or spot the chronic latecomers and understand the reasons behind it. Maybe they would be better off with starting their workday an hour later and working an hour longer in the evening, but are uncomfortable to ask; you never know, right?

Tip: If you don’t see the correct time format, right-click on any of the cells that contain the inaccurately displayed data, select the “Format Cells” option and then you’ll be able to choose the right format for the data that contain time. Keep in mind that it will configure only the currently selected cell.
Overall, automatically collected data can benefit you simply by being available to be manipulated in whichever direction you need. These are just a few examples of the kind of analysis opportunities that you have with the data exported from DeskTime, but it ultimately depends on what your needs are and what’s your reason for using automatic time tracking software.

Looking for ways to up your business?
Use DeskTime for time management and always stay on top of your team’s efficiency ratings!
Any questions about using employee productivity software to export automatic data? Any suggestions about what you’d like to see next? Leave a comment in the comment box below, and we’ll be sure to answer!
Did you find this article useful? Give it a clap!
Psst! You can clap more than once if you really loved it 🙂